Skyware Systems has the ability to allow gift cards to be issued and accepted at your Property, partnering with the company Factor 4. Gift cards can be extremely useful tools for your business, allowing you to increase your sales and attract new customers, reduce fraud and be an effective marketing tool. Your guests can use gift cards as a convenient substitute for cash when making reservations or purchases and scheduling any activities, or if they wish to give a gift to someone else. Before any gift cards may be issued or used however, gift card use must be enabled for your Property. Gift card use is NOT authorized automatically by Skyware as gift cards are not considered to be a standard payment type. Gift card use MUST be authorized by Skyware for your Property before any can be issued or used. Nevertheless, the process of enabling gift card use is a simple one, and once enacted gift cards may be freely used by your guests whenever wished, acting as any other regular payment type would. Please call us if you would like to enable the use of gift cards at your Property.
Note: Gift cards are physical cards appearing much like a credit card. For gift card use at your Property, you must have a supply of blank gift cards (purchased from Factor 4) ready to be activated when purchased by your guests.
Once gift card use has been authorized, the first step in enabling gift card use is to generate a Posting Type with the Department selected as Payment. A gift card posting type will be set up as any credit card would be, but with the credit card type selected as gift card. (Credit card posting types are set up for you as standard in Skyware).
Then, once a gift card posting type has been generated, the Quick Sale screen Gift Cards tab is used to activate the specific gift card with the desired value. Templates for gift card amounts that are commonly requested or for promotional purposes may be generated using the Quick Gift Card screen - if you wish to load a gift card with an amount other than the purchase price (such as spend $50, get $75 value) you MUST set it up as a template before card activation.
Once a gift card has been activated, it can be used as you would a credit card - with a maximum spend being the balance placed on it. Gift card use will be shown on any receipt under the payment type category.
The Quick Sale screen is also used for adding value to an existing gift card, if a balance inquiry is requested or any deactivation/reactivation of gift cards.
Select Managers Screen from the Quick Menu on the left side of the screen, then select Configuration > Post Types.
Select Manager's Screen to be taken to the MANAGER'S COMMANDS screen.
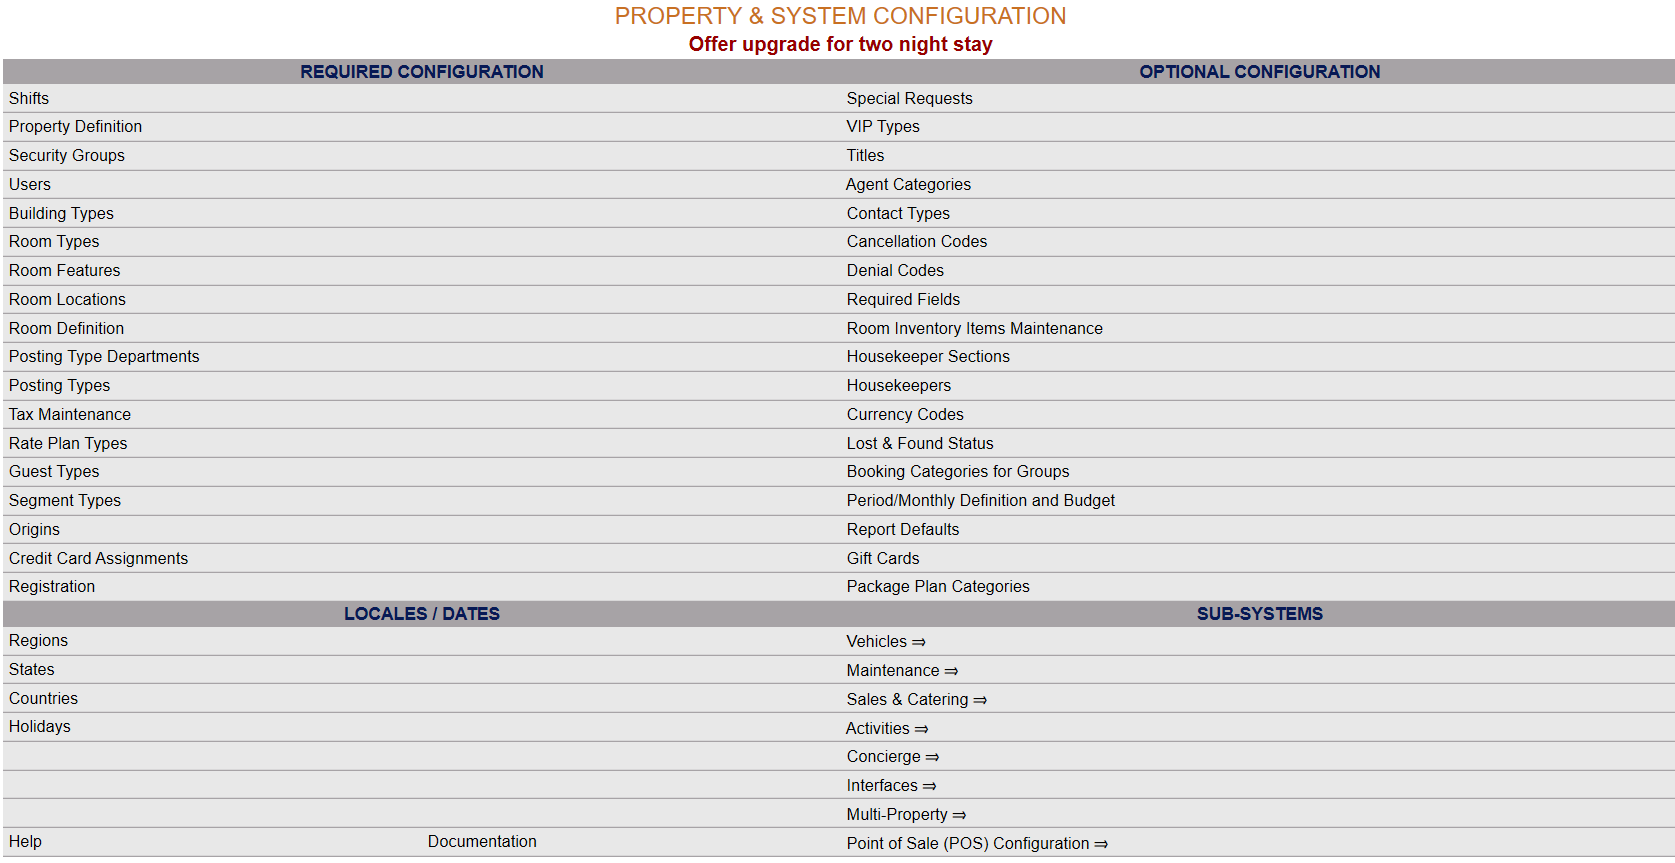
Select Configuration to be taken to the PROPERTY AND SYSTEM CONFIGURATION screen.
Alternately, you may also be able to select Configuration directly from the Quick Menu, if the menu has been set up to include the Configuration option.
This will take you to The Property System Configuration Menu.
The list of property configuration options are divided into four sections, which are Required Configuration, Optional Configuration, Locales/Dates and Sub-Systems.
Select Post Types from the Required Configuration section.
The Post Type Maintenance screen display is split into two frames, with the left side of the screen listing the Post Types already defined and the right side containing the fields you need to complete in order to add or edit the configuration for a Post Type. Any changes made on the right, once saved, will be updated in the listings to the left.
By Default, the General tab will be open when you arrive at the Post Types Maintenance screen. The large majority of the required information is located on this tab, if you are a multi-Property user of Skyware Systems, there will be another tab available, the Multi-Property tab.
Your options include the following:
Generate a new entry:
Click the New button from the toolbar to add a new Posting Type.
Complete the fields described below.
OR:
Select an existing Posting Type from the list on the left, and click the Replicate button from the toolbar. Then change the field information as described below.
Note: It may be useful to select an existing credit card entry and replicate it to generate the gift card posting type, as the majority of the posting information will be the same.
On the General tab:
The General tab contains a lot of required information. This Help topic will focus on the essential fields for the purposes of generating a gift card posting type.
General tab - Posting Type information (top) section:
1. Post Type #: This is the number assigned to the Posting Type. This field is required. Therefore, enter an appropriate number for the gift card posting type.
2. List Order: This is the order the Posting Types will be displayed in the interface. it is recommended that you order the gift card posting type to be grouped with the Payment department type.
3. Department: This is a drop-down menu of available Posting Type Departments. Select Payment. This field is required. You MUST select Payment to enable gift cards correctly.
4. Payment Type: Payment type of Posting (required for Deposit or Payment). This is a drop-down menu of available options. select Credit Card.
5. Short Name: This is the Posting Type Short Name, and this is how the Posting Type will appear when used. This field is required. This field may be entered as you wish, but it is suggested that you use something similar to "Gift Card payment".
6. Long Name: This is the long name of the Posting Type, and is a more detailed description of the Posting Type. It appears on some reports. This field is required. Again, this field may be entered as you wish, but it is suggested that you use something similar to "Gift Card payment".
7. Category: This is a drop-down menu of available Categories for the Posting Type. Select Settlement.
8. Credit Card Type: As in the Payment Type option you have selected credit card for this Posting Type, you must use the drop-down menu here to select a type from the options available. Select the option Gift Card.
General tab - How the Posting Type is used section:
This boxed section (on the left side of the General tab) contains various questions that help define how your Posting Type is used. For a gift card posting type, the Can this posting type be used as a Payment? box should be checked.
If you have multiple Properties with Skyware Systems, the Posting Types screen will have a second tab titled Multi-Property. On this tab, you get to specify where the gift card posting type is available/may be used.
Default Hotel: This is the Property used as the default option for the Posting Type. Your available Properties will be listed in the drop-down menu. Select one.
This field is required. Every Posting Type, including the gift card posting type, must be associated with at least one Property.
This posting type is available to all properties?: This box may be checked or unchecked. By default it is unchecked. You may decide if the gift card posting type is specific to a certain Property, or not. If the box is checked, it will be available throughout all your Properties with Skyware Systems.
When you are finished adding or editing the gift card posting type, click the Save button to save the changes.
Once a gift card posting type has been created and saved in Skyware, you may then generate and activate gift cards.
Once the gift card posting type has been created, gift cards may be issued via the Quick Sale screen. The Quick Sale screen is used as part of the process is (usually) taking a payment for purchasing the gift card, and a receipt for the gift card will need to be printed every time. When dealing with gift cards, you should always give a receipt as proof of what has taken place - be it initial activation, money added to an existing card or even a simple balance inquiry, as well as if the card has been cashed out.
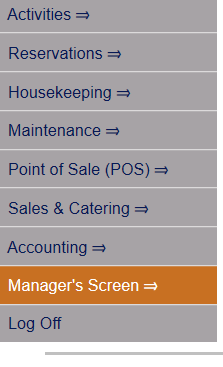
Select Point of Sale (POS) => from the Quick Menu on the left side of the screen, then select Quick Sale from the checks section.
Select Point of Sale (POS) => from the Quick Menu
OR:
Select Point of Sale (POS) => from the Other section of the Full Menu.
Click the icon on the left, or the breadcrumb words "Full Menu" on the top right of the screen to open the Full menu.
This will display the Full menu in a tabular form, with four sections, Registration, Status, Cashier and Other.
The section on the bottom right is the Other area. Select the Point of Sale (POS) => command.
When selected the POS Menu will open. The full menu is divided into two main categories: Checks and Reports.
Select the Quick Sale command in the Checks section.
When selected, the Quick Sale POS screen will open.
For any gift card generation and activation, you will need to use the Gift Card tab on the Quick Sale screen. Click on the tab to open it.
When opened, the gift card tab will show all the fields necessary for you to activate a gift card.
FIRST, you must swipe the gift card to generate the Card token. You MUST scan the gift card first to get the token before anything further can happen. This is the physical card that will be given to the purchaser and subsequently used as the gift card. Only once a token has been entered into the Card Token field will you be able to proceed with any thing further, be it activation, adding value, balance inquiry or deactivation.
One you have generated the card token, you may proceed to activate the card:
To activate a new card, you will need to select the radial button "Activate/Set Balance" from the available options in the right side buttons under Manual Gift Card and complete the field with the desired amount. (Subsequently other actions are available for use with gift cards but initially the card must be activated for use).
Once the field has been completed with the balance to appear on the card, click the "Post" button (to the right of the tab). This will then post the required payment for issuing the gift card (any time money is placed on a gift card, it must be purchased with some other form of payment). Take the payment as usual, and print out the receipt for the purchaser.
Note: If you have Gift Card templates (created using the Quick Gift Card screen) the templates will appear as buttons available for selection on the left side of the tab under Quick Gift Cards.
Using a gift card template will automatically fill out the card information (how much it will be loaded with, and how much the cost will be when posted). You will however still need to click the post button, take the payment and print the receipt. IF you wish to load a gift card with an amount OTHER than the purchase price (such as spend $25, get $50 value) you MUST set it up as a template before card activation.
An activated gift card now acts as a credit card would (to the total of the amount placed on it), and may now be used for payment in the same way; when used, the payment type on the receipt will list gift card.
The Quick Sale screen is also used for adding value to an existing card, if a balance inquiry is requested or any deactivation/reactivation of gift cards. These actions are all choices within the radial button options on the right side of the Gift Card tab. This is because for any of these actions you will need to give a receipt to the gift card holder. For example with a balance inquiry, the receipt would be printed with the total remaining balance on the gift card. the receipt is a proof of what action has taken place, for both you and the recipient.
Date Updated October 15, 2024